Automatic export to an FTP server
- Mathilde Lamy
- Oct 17, 2023
- 2 min read
Updated: Jan 30, 2024
This feature allows you to configure automatic sending, according to a defined frequency, of reports generated manually or automatically to an FTP type server.
Prerequisites
In Daxium-Air: If you want to export reports, you must have report templates (automatic or scheduled) previously configured in Settings > Reports

Excluding Daxium-Air: The identifiers (login and password) of an account on an FTP or FTPS server (FTP with SSL), having rights to create folders and files.
Configuring integration with the FTP server
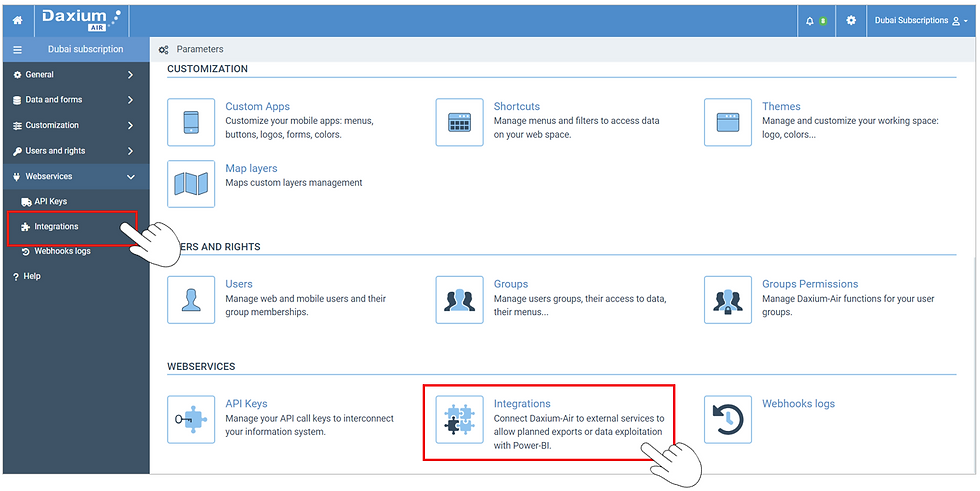
Go to Settings > Webservices > Integrations:

If you do not have an "FTP" active:
Click the "Add" button at the top right and choose the "FTP" integration

In the add screen, enter a name, check "Active", then fill in "User name" and "Password".
If your server uses the FTPS protocol (FTP with SSL), also check "SSL" :

Click the "Save" button at the top right, reopen the integration and click the "Check connection" button at the top right. :

If a green message "Connection successful" appears, you can continue.
If not, correct the settings and click on "Save".
Then repeat the "Check Storage Connection" operation until you get a success message.

Scheduled export configuration
Go to Settings > General > Planned Exports:

Click at the top right on the button "Add export" and select "Periodic data export" :

In the first section, enter a name, check "Active" and choose the integration previously created and verified previously in the "Integration" list. You can also check the forms to include:

In the "Manual and automatic reports" section, if you want to export reports, check "Active".
If necessary, edit the name of the "Directory" using the "Edit" to the right.
Types of reports to export:
Manual reports: reports generated manually by all users of the business vertical
Automatic reports: automatic or scheduled reports generated on the business vertical
Report modes to export:
Listing reports: reports with the "Listing mode" option, which contains information from several records
Individual reports: reports containing information from a single record

Note: Favor exporting the bare minimum, so as not to export too many files and take up space unnecessarily.
In the "Directory or folder" section, check the desired options:

In the "Export Scheduling" section, choose a start time in at least 5 minutes, as well as other parameters as you wish:

Finally, click at the top right on the button "Save".
To check that your export is working correctly, return to the list of scheduled exports and take note of the values in the "Last execution" and "Next execution" of your export:

Wait at least 10 minutes after the scheduled execution time of your export, then refresh the page.
If the export is successful, you will see that the values have been updated.
Your files are now available on your FTP server.
If that fails, click the "Show" in the column "Last export message".
Fix any configuration issues, then change the start time of your export to run it again.
